Image Source: Google
Transforming your garage into an organized and functional space can be a game-changer for your home. One key element of a garage makeover is installing wall cabinets. Not only do they provide valuable storage space, but they also help keep your tools and supplies within easy reach. With a little bit of time and effort, you can customize your wall cabinets to suit your needs and style. In this guide, we will walk you through the steps to install and customize your wall cabinets for a DIY garage makeover.
Materials Needed
To install the cabinets:
- Wall cabinets
- Stud finder
- Level
- Screws
- Drill
- Screwdriver
- Measuring tape
To customize the cabinets:
- Sandpaper
- Primer
- Paint
- Brushes or rollers
- Hardware (handles, knobs, etc.)
- Optional: decals, stencils, or wallpaper for a decorative touch
Installation Steps
1. Plan and Measure
Before you begin installing your wall cabinets, it's essential to plan out where you want them to go and measure the space to ensure a proper fit.
2. Locate Wall Studs
Using a stud finder, locate the wall studs where you will be attaching the cabinets. This will ensure that your cabinets are securely mounted to the wall.
3. Mark the Cabinet Placement
Use a level to mark the height at which you want to install the cabinets. Then, mark the placement of each cabinet on the wall with a pencil.
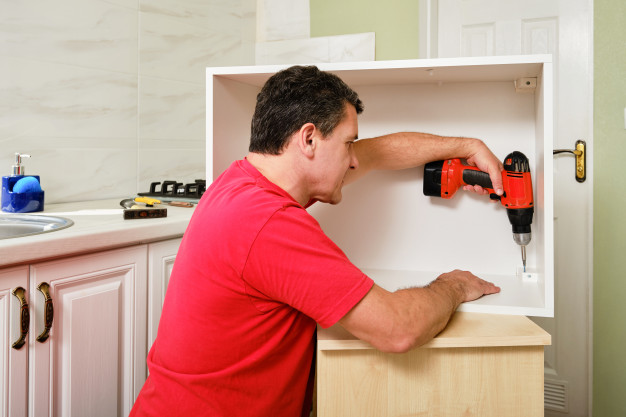
4. Install the Cabinets
- Starting with the upper cabinets, use the drill to attach each cabinet to the wall studs with screws. Make sure they are level and securely fastened.
- Once the upper cabinets are installed, move on to the lower cabinets following the same process.
- Double-check that all cabinets are level and properly aligned before proceeding.
Customization Ideas
1. Sand and Prime
- Before painting your cabinets, be sure to sand them down to create a smooth surface for the paint to adhere to.
- Apply a layer of primer to help the paint stick and prevent any wood grain from showing through.
2. Paint
- Choose a paint color that complements your garage's decor or adds a pop of color. Consider using a durable paint finish that can withstand the wear and tear of a garage environment.
- Apply the paint using brushes or rollers, making sure to cover the entire surface evenly.
3. Add Hardware
- Upgrade the look of your cabinets by adding stylish hardware such as handles or knobs. Choose hardware that is both functional and visually appealing.
- Measure and mark the placement of the hardware before screwing them into place.
4. Personalize with Decorative Touches
- For a unique touch, consider adding decals, stencils, or wallpaper to your cabinets. This can help tie in your garage's theme or simply add a bit of personality to the space.
- Make sure to properly adhere any decorative elements to ensure they stay in place over time.
Conclusion
Installing and customizing your own wall cabinets can take your garage from cluttered chaos to organized oasis. By following these steps, you can create a functional and visually appealing storage solution that suits your needs and style. Whether you're storing tools, sporting equipment, or gardening supplies, wall cabinets are a versatile and practical addition to any garage makeover project. Take the time to plan, measure, and customize your cabinets to transform your garage into a space that is both efficient and enjoyable to use.